Servo Motor and Drive – Connection, Installation Basics In 3 Mins
An overview of the installation, and connection of the servo motor and drive for beginners when you start to use the servo system for your applications

In this article, 365evn shows you the connection, and installation basics for servo motor and drive. An overview for beginners when you start to use the servo motor and servo drive for your applications. The contents of this article applied to all servo brands such as Mitsubishi, Delta, and Yaskawa… Each servo series has a little difference, I will guide you in detail in the next article on 365evn.
You can refer to the previous article on 365evn about servo motor and drive:
Basics of Servo Motor and Drive for Beginners in 5 Mins
Servo Motor and Drive – Installation Basics
- From the previous article, every servo system includes: Servo motor, servo drive and connection cables

- Servo motor installation
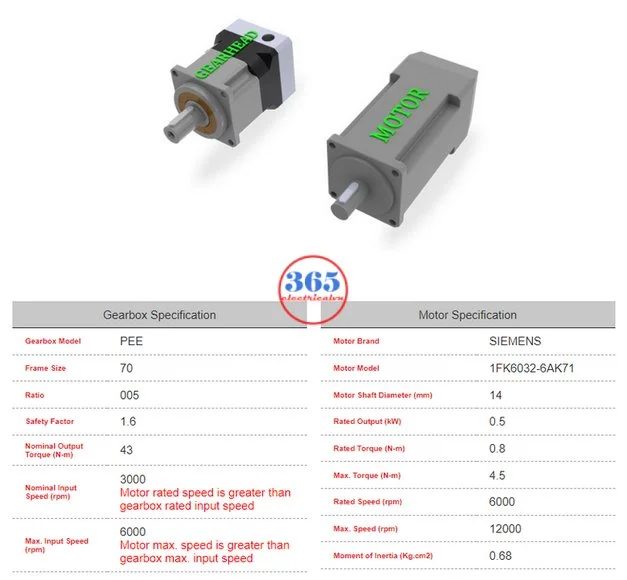
- The servo motor is a part of a machine or a transmission system. In normal, we used a gearbox and installed the servo motor to the gearbox. It is easy, you can check the frame of the servo motor and select a gearbox with the same frame.
- You can contact the supplier for more information. Some gearbox manufacturer has the tools to help you select the right gearbox for your servo motor.
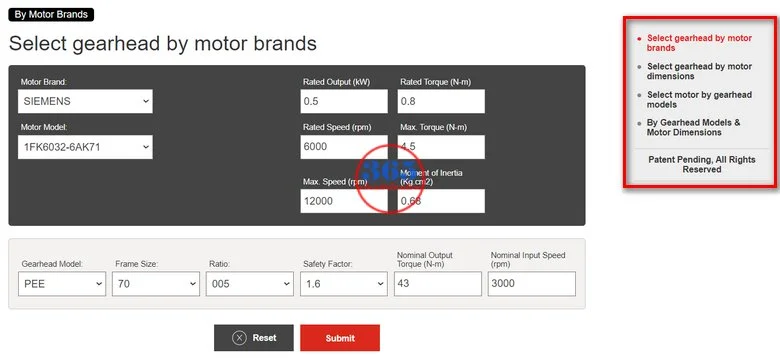
- Final, we make an installation for the servo motor and gearbox to your application. It depends on your mechanical design.
- Servo drive installation
- In normal, the servo drive is installed on the control panel of the control box. We use the screws to mount the servo drive to the control panel.
- Each servo drive has a manual to guide you to install it. Read it before making an installation for the drive.
- When you install the servo motor and drive, pay attention to the environmental condition as heat, water, vapour, dust, oily dust… vibration and interference of electromagnetic noise.
- I always recommend you read the user manual before making an installation for the servo drive and motor. Some manuals you can read and download on 365evn: Link
Servo Motor and Drive – Connection Basics
- Servo motor connection
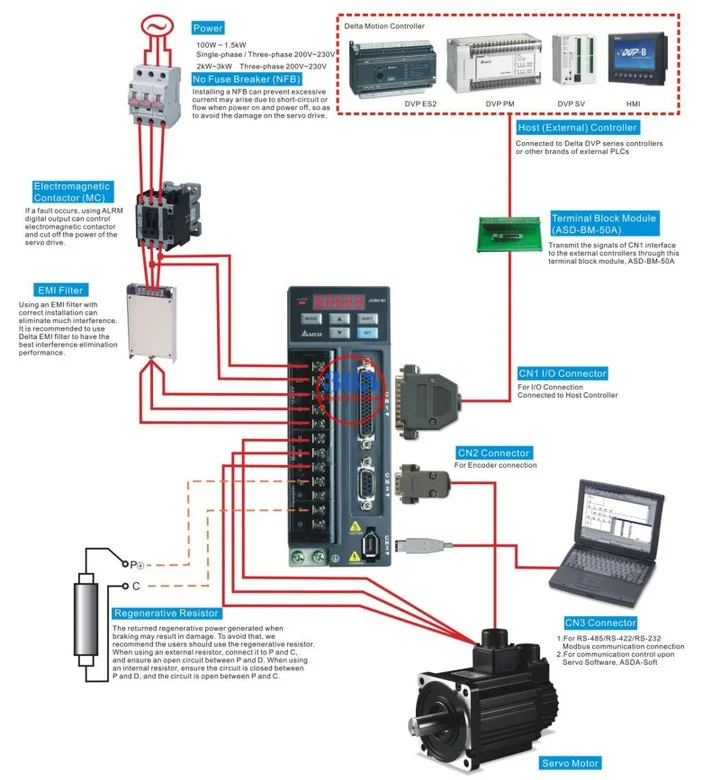
- The servo motor is connected to the servo drive by two cables: The motor power cable (including the braking signal if the motor is supported) and the encoder cable.
- Connect it is easy with the symbol on the servo drive
- Servo drive connection
- The servo drive connects to the servo motor (guide above)
- Depending on the servo series, the servo drive has some connectors as:
- Power input for control and main circuit: 1 phase (220 -240 VAC) or 3 phases (220 VAC or 380 VAC)
- Regenerative resistor terminal or braking unit: Connect to an external resistor or braking unit
- I/O connector: Input and output signal used to connect to the controller (PLC…)
- Servo programming connector: Connect to the PC through servo software from the manufacturer.
- Communication connector: Connect to another drive, PLC, HMI… through RS232/485, CANopen, DMCNET, EtherCAT…
- Another connector: Connect to the battery unit, safe torque off function (STO)…
- Do not worry, 365evn will guide you to make the connection for the servo motor and servo drive step-by-step in the next articles.
Delta servo drive and motor – Installation, connection and programming
Presently, I have a tutorial series about Delta servo drive and motor on Youtube. You can refer to all here.
If you can not watch the video above, please check another link in my Video Area (SV0011) or give feedback to me via WhatsApp, Email, or Message. Thank you!
Summary
An overview of the installation, and connection of the servo motor and drive for beginners when you start to use the servo system for your applications… I hope that it is helpful for you. Follow me on my website, Facebook, and YouTube… to get the newest content.
Bạn có thể than khảo bộ Delta servo cũ, bộ cáp lập trình đa năng cho servo, PLC, HMI… tại shop 365evn (Delta servo used and programming cable for PLC, HMI, VFD…): Link
If you have any questions, comment below. Do not copy or re-up the content.
–365EVN–
If you find this content valuable, please rate it (click the button above), share it with your friends or invite me for a coffee by clicking the button below.


