No products in the basket.

DOPSoft Tag table can import the Symbol Table from WPLSoft & ISPSoft. With this, we can create the tag table simple and effective.
DOPSoft tag table is used to help users set tags for the memory addresses. DOPSoft 4.00 allows users to import the Symbol Table edited by WPLSoft and ISPSoft, enhancing the convenience of programming. This way helps you to create the tag table on DOPSoft 4.00 – simple and effective.
Contents
Create a DOPSoft Tag Table – What’s you need?
- The DOPSof v4.00 software for Delta HMI Programming. You can download DOPSoft v4.00.11 at the download center.
- A “*.csv” file is exported from the ISPSoft symbol table (or WPLSoft). Read more: Manage variables on ISPSoft 3.14
Step 1: Create a project on DOPSoft 4.00
- Open the DOPSoft 4.00, select your device, and set the parameters for communication to PLC.
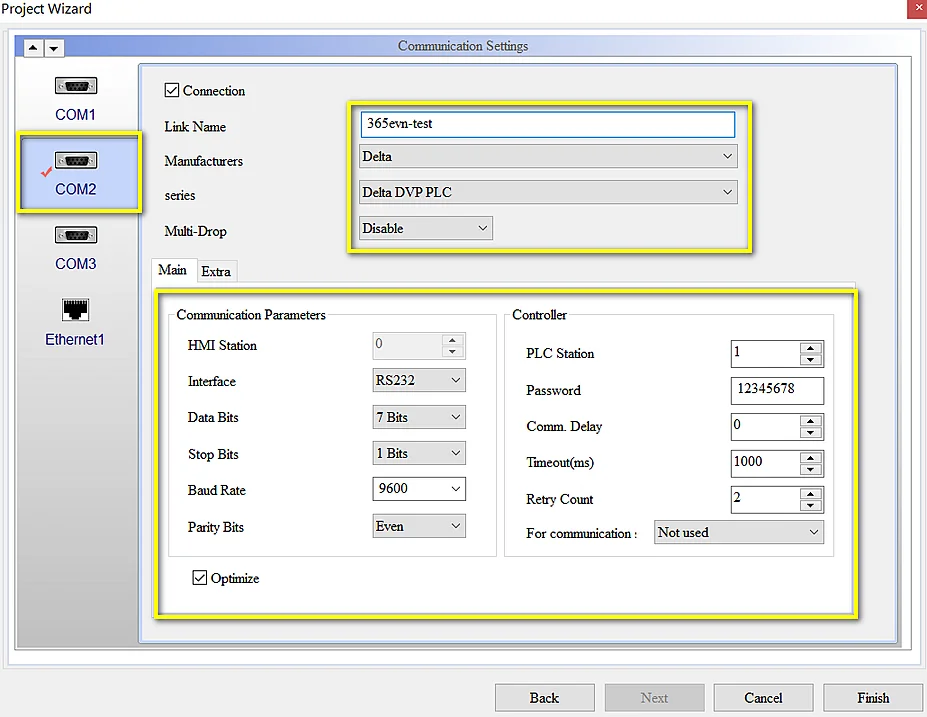
- Click “Finish” and open the editing windows.
Step 2: Create a tag table
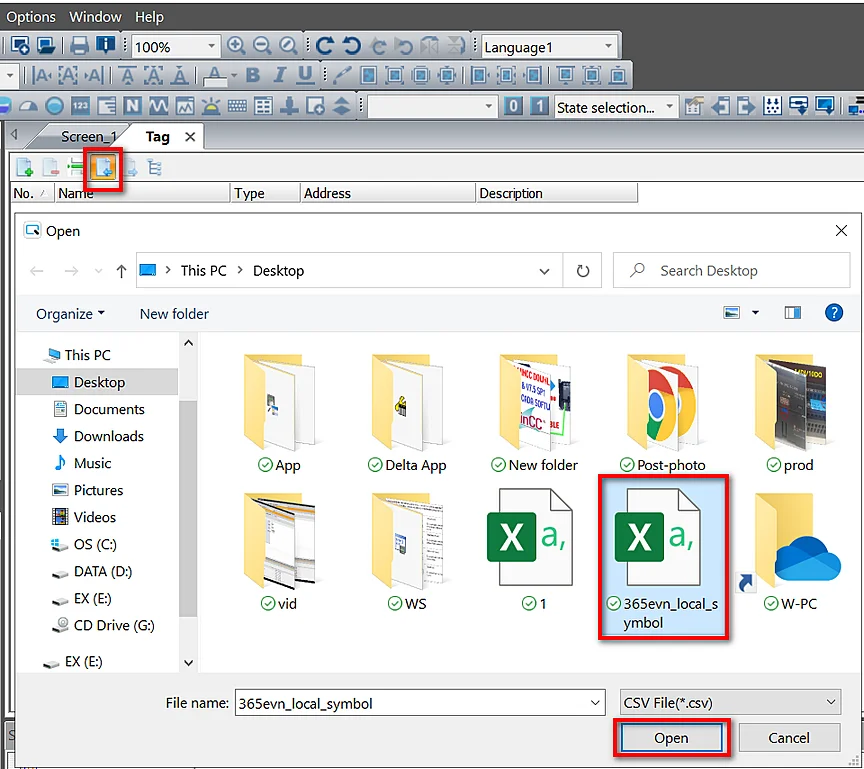
- Click “Options” -> “Tag Table” -> “Import label” and browse to the “*.csv” file which we exported from the ISPSoft symbol table. And then open it.
- Select the communication port (COM 1,2, 3 or ethernet) used for connecting to the Delta PLC and set the station number. The default station number is 0, but you can set the number as you like. Press “OK” to import the symbol table to DOPSoft 4.00.
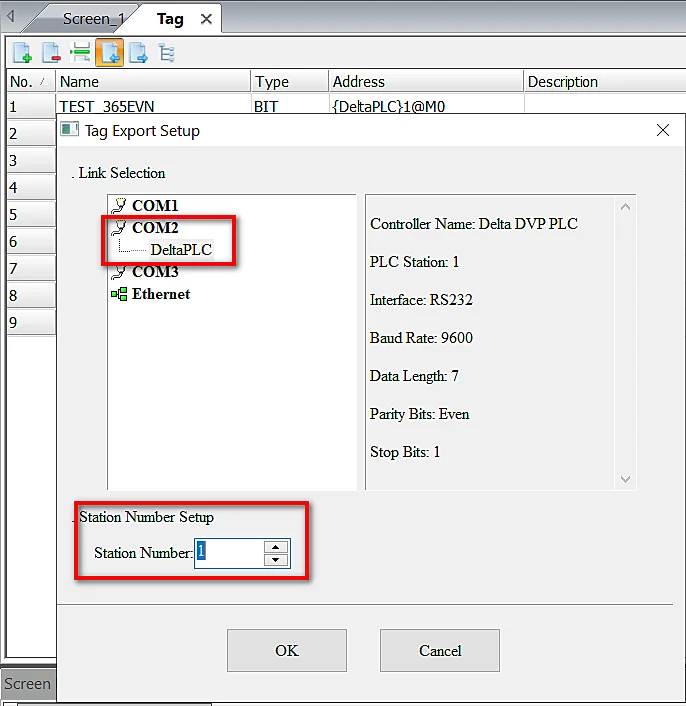
- After pressing “OK”, the symbol Table of ISPSoft 3.14 (or WPLSoft) is imported to the DOPSoft tag table. The imported symbols are all recognized by DOPSoft symbols as upper case letters. For example, the lower case symbols of “tag_m1” edited in ISPSoft (or WPL) are recognized as upper case symbols of “TAG_M1”.

- On the Delta Dopsoft tag table, you can click the icon:
- Add label: to add a new tag data entry.
- Insert label: When you press it, the new data entry is inserted above the row of the selected row.
- Delete label: When you select a row of data entry, press it to delete the selected row.
- Export label: You can save the edited tag on the DOPSoft tag table as a “*.CSV” file, and use Microsoft Excel to edit the contents.
Guide video Download Delta HMI Program And Upload via Ethernet Using DOPSoft V4.00
If you can not watch the video on Youtube, please watch it: Here
If you can not watch the video above, you can watch it on my Youtube channel – Link or my video area.
Conclusion
With the above way, we can create and manage the DOPSoft tag table simply and effectively. It helps you save more time to program a Delta HMI project.
If you have any questions please comment below.
See you in the next post!
-365evn.com, Refer Delta–
If you find this content valuable, please rate it (click the button above), share it with your friends or invite me for a coffee by clicking the button below.
Subscribe
0 Send a comment to us!
Newest


